JWT token validation in Ktor with Client Credentials Flow

At Lunatech we build many tools that facilitate internal processes like keeping track of employees' vacations, share internal events and workshops and even one just for the days Lunatech offers us lunch ;) So, it’s only natural that we end up creating integrations between these applications.
The goal of this post is to explore the scenario where one application authenticates with another by using the Client Credentials Flow, in Kotlin, Ktor and Keycloak.
To achieve this, we are going to build a simple personal luna-vacation-bot that will inform you daily, via a Slack message, whether the present day is a vacation day or not. For this, we will need to implement a dummy luna-vacation-api as well.
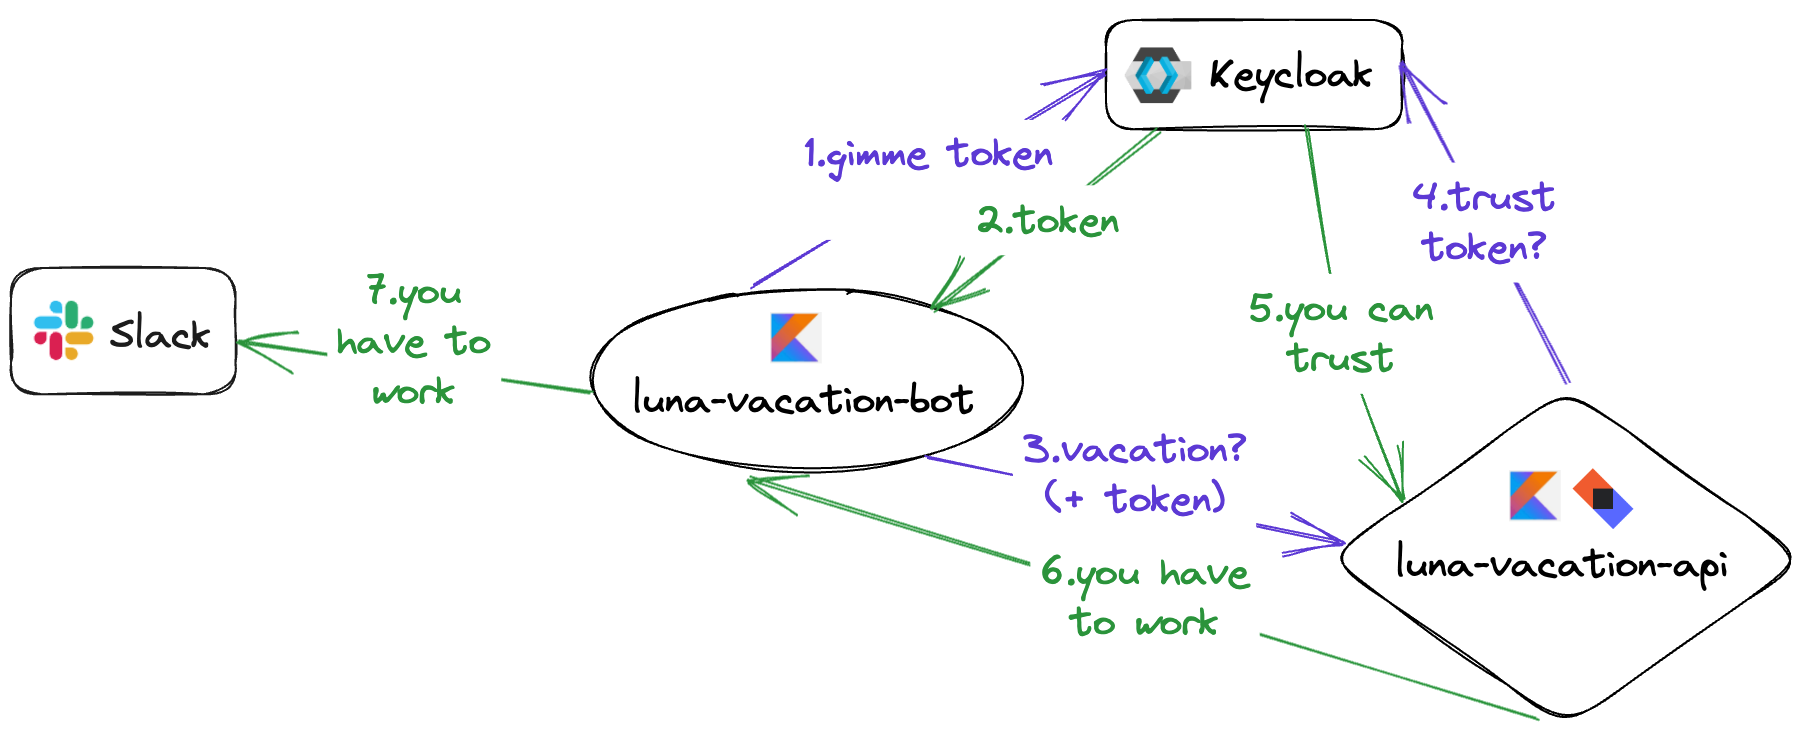
In the above diagram, we can see that the starting point of our system will be the luna-vacation-bot. It asks the luna-vacation-api whether the present day is a working day or not, but, for that request to be successful, first it needs to request a JWT token from Keycloak. Once it receives the token then it can send the request to the luna-vacation-api and, based on the response of that request, it can inform the user via a Slack message.
If luna-vacation-bot fails to receive a token from Keycloak or, if luna-vacation-api does not respond successfully, we can also send an error message via Slack, informing the user of the issue.
How to setup Keycloak?
First, we need a running instance of Keycloak. Recently, Lunatech deployed its own Keycloak instance for the Identity and Access Management of applications, but for this example I’m going to run a local instance of Keycloak, instead. We can easily run one using Docker.
The admin console can be found at localhost:8080 with both username and password being admin.
Create a realm
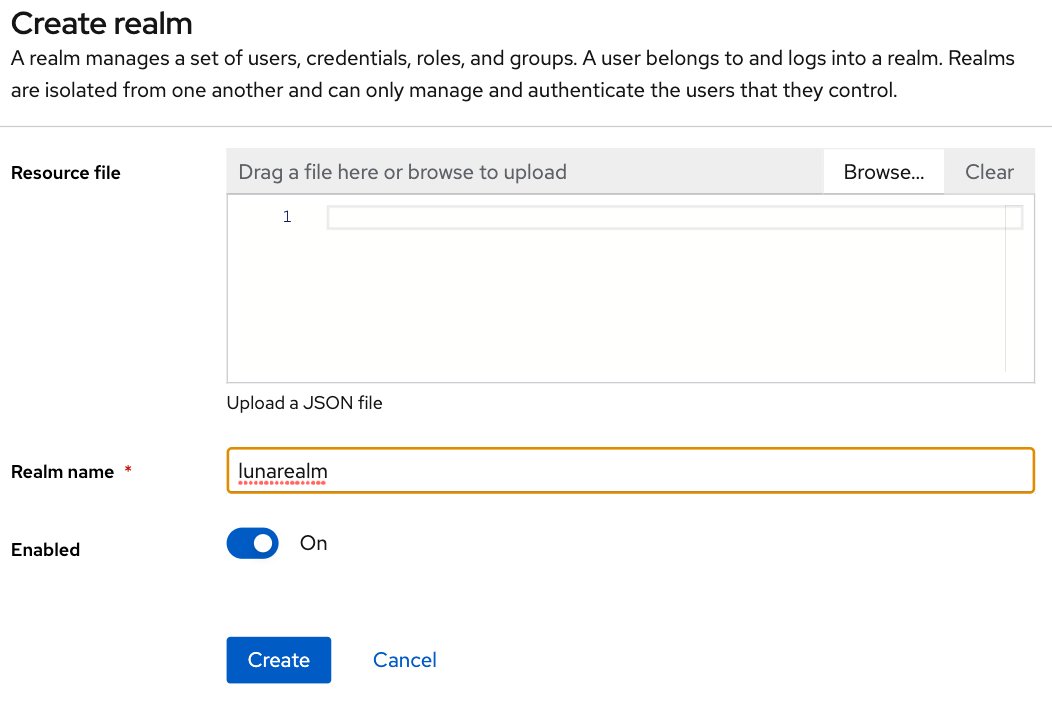
On top of the default master realm let’s create our own realm called lunarealm.
Create a client
Let’s create the client luna-vacation-bot which is the one that is going to need to authenticate with the luna-vacation-api and use the API:
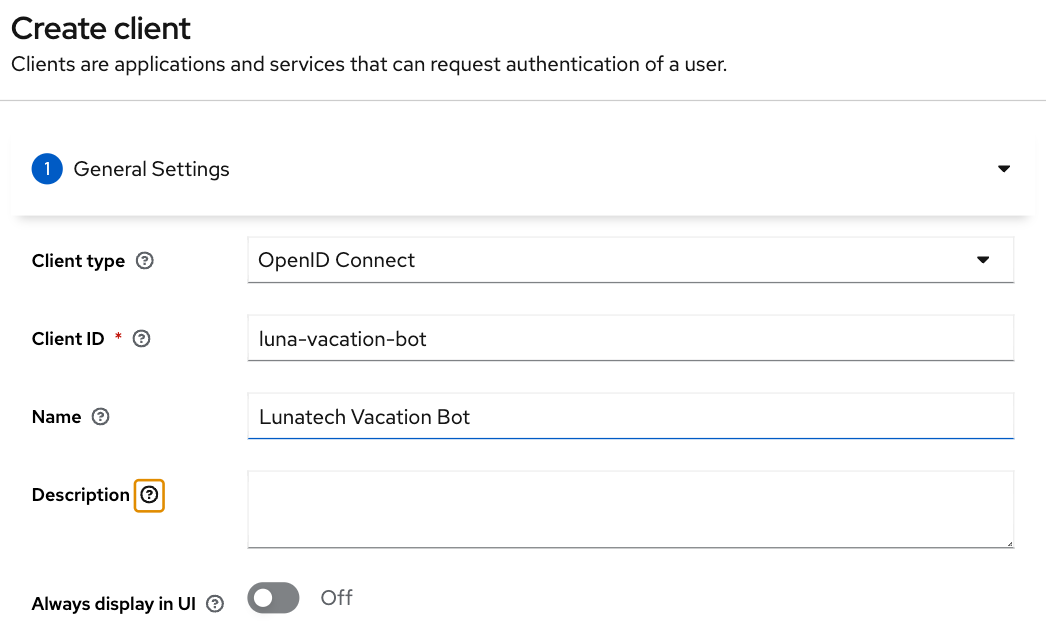
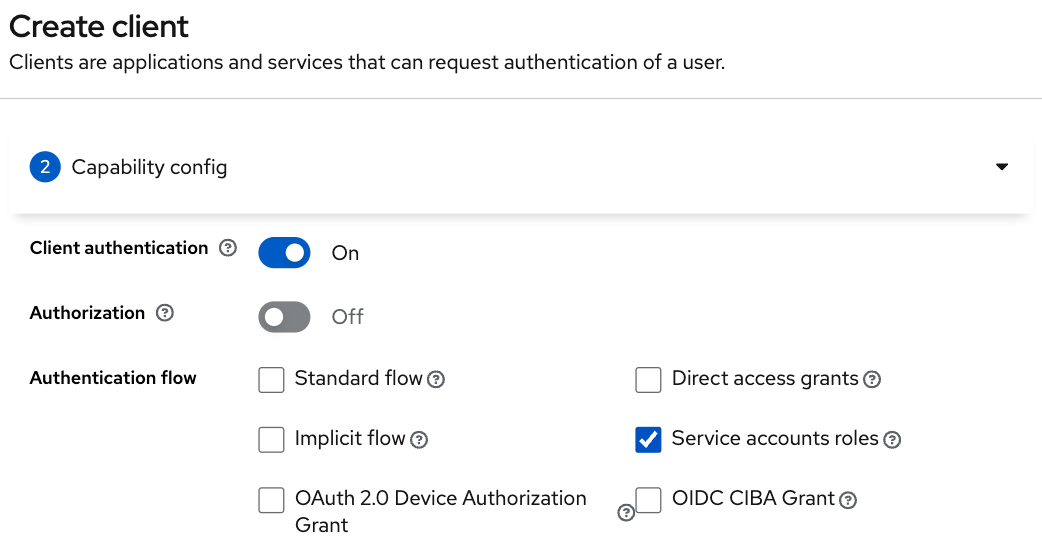
After setting the client id, name and description, click Next for the capability config section and turn Client authentication and Service accounts roles on and all the other authentication flows off. The client is now configured for the Client Credentials Flow in OAuth2. Click Next again and Save.
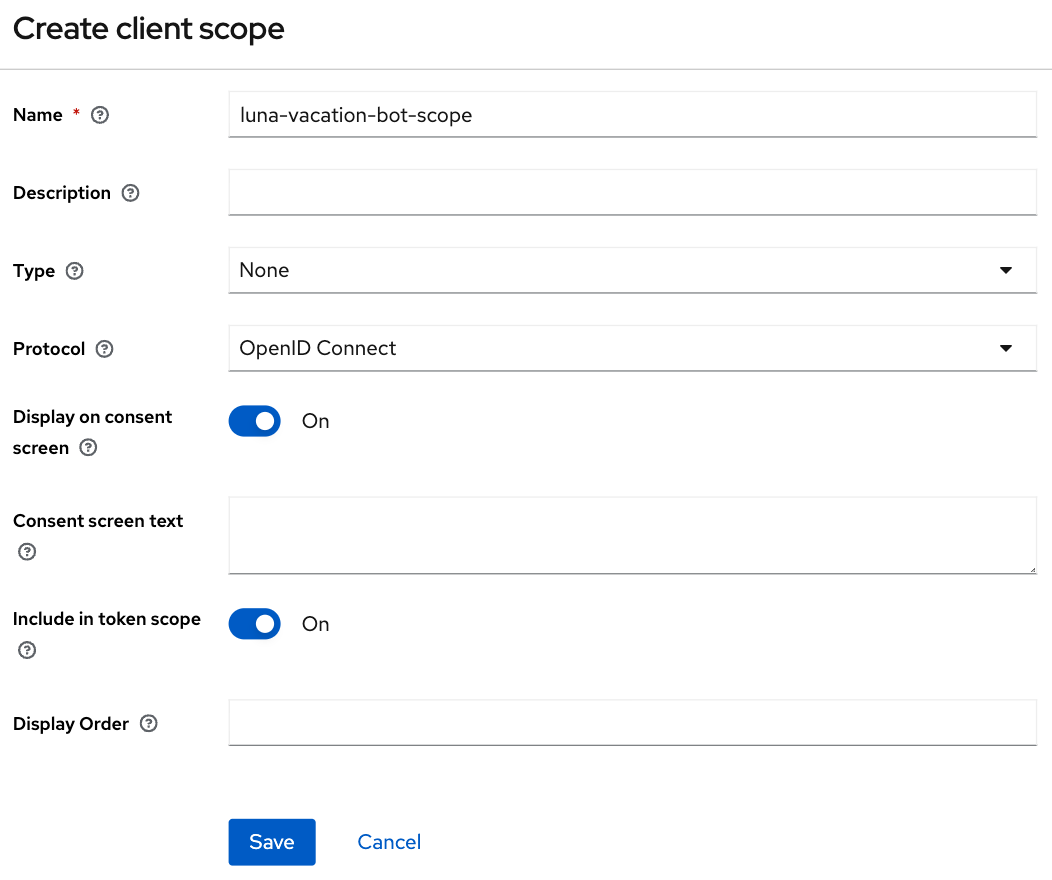
In order to increase our client security, we are also creating a new Client Scope called luna-vacation-bot-scope using the default settings:
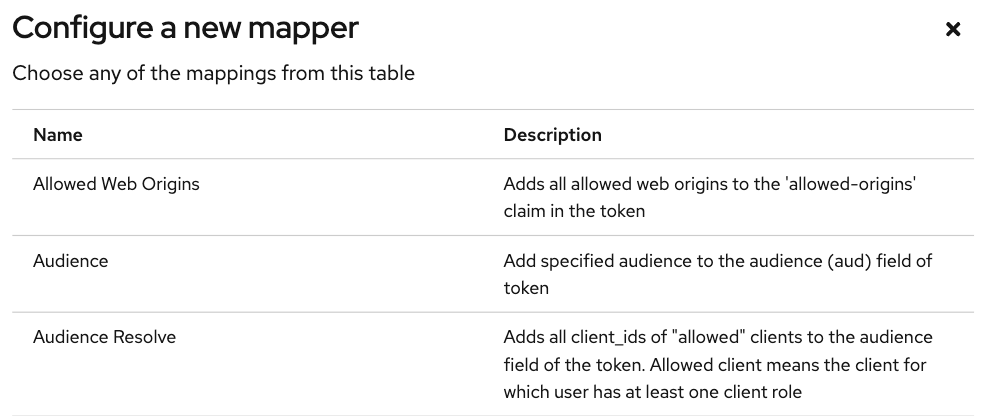
Once you save the new scope, a couple of configuration tabs will show up: Mappers and Scope. Go to Mappers and choose Configure a new mapper and then choose Audience:
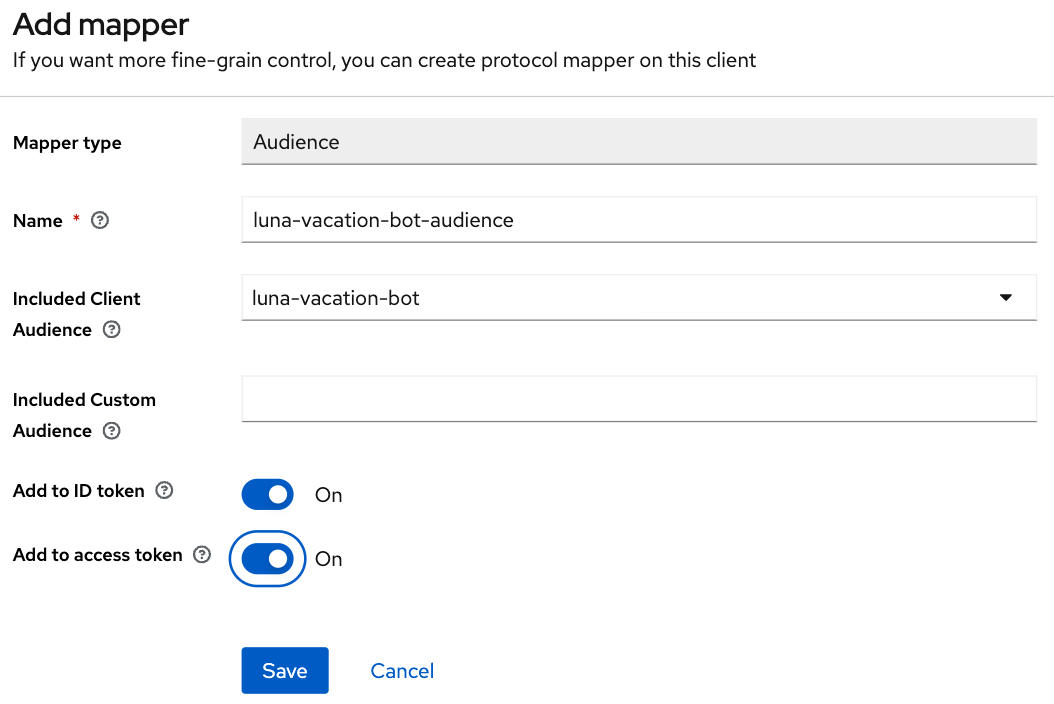
Give it a name and then set luna-vacation-bot in Included Client Audience and also add it to the tokens:
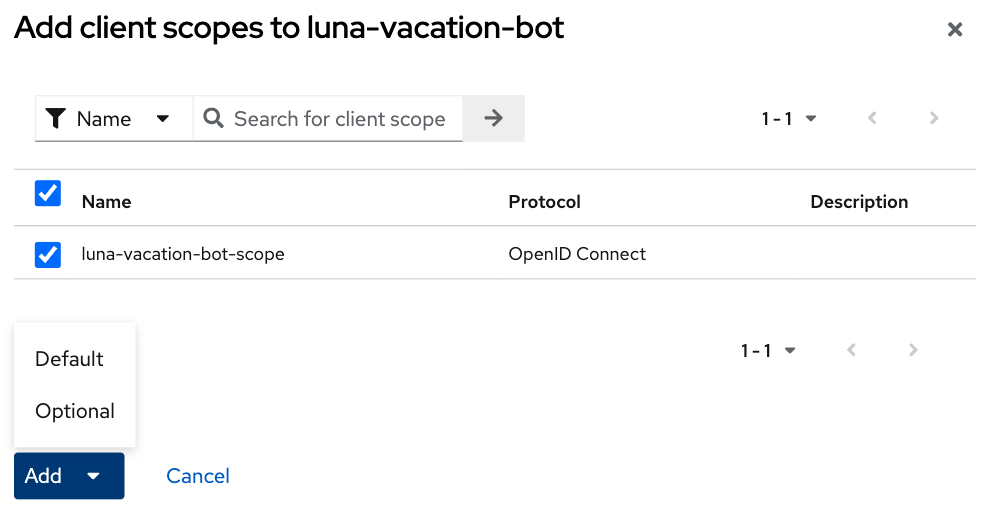
Go back to the details of the luna-vacation-bot client, to Client scopes, Add client scope and choose the new luna-vacation-bot-scope Default scope and add it:
One more client scope needs a final configuration. Go to the dedicated client scope called luna-vacation-bot-dedicated and click on it.
In Mappers choose Add mapper > From predefined mappers and then add audience resolve:

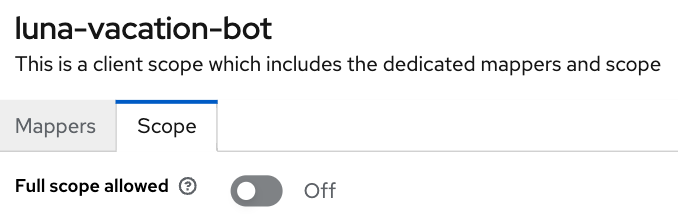
Finally, still inside the same luna-vacation-bot-dedicated scope, go to the Scope tag and set Full scope allowed off.
We are all set to start using JWT tokens!
Test the creation of a token
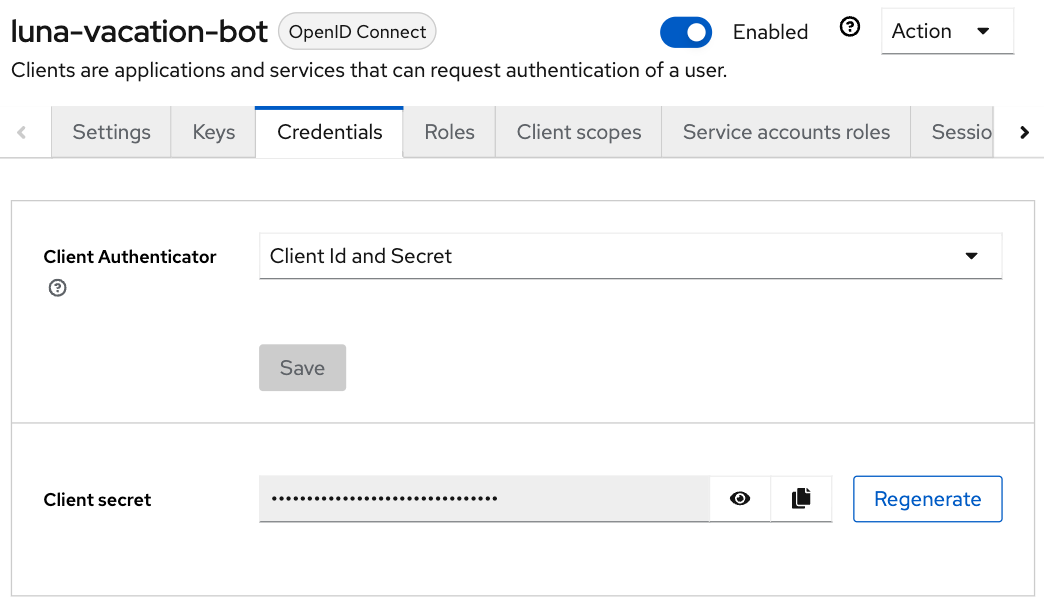
To test if luna-vacation-bot can successfully get a JWT token we also need the client secret.
The secret can be found in the Credentials tab:
Let’s use curl to generate the token:
curl -X post 'http://localhost:8080/realms/lunarealm/protocol/openid-connect/token' \
--header 'Content-Type: application/x-www-form-urlencoded' \
--data-urlencode 'grant_type=client_credentials' \
--data-urlencode 'client_id=luna-vacation-bot' \
--data-urlencode 'client_secret=<replace-by-secret>'
The token will look something like:
{"access_token":"eyJhbG...75Eg","expires_in":300,"refresh_expires_in":0,"token_type":"Bearer","not-before-policy":0,"scope":"email luna-vacation-bot_scope profile"}Verify the token in jwt.io
In jwt.io you can inspect the contents of a token. Copy the access_token string and paste it in the Encoded box. I’m not going into details about the format and content of the token, you can read a nice introduction about it in jwt.io site as well.
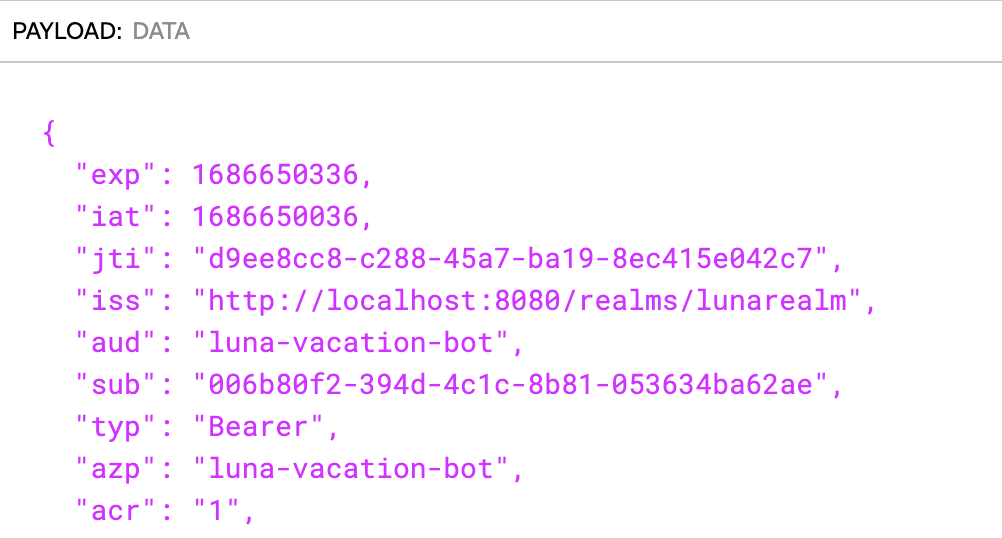
We can confirm that the issuer (iss) of the token is lunarealm and that the audience (aud) and the authorized party (azp) are luna-vacation-bot.
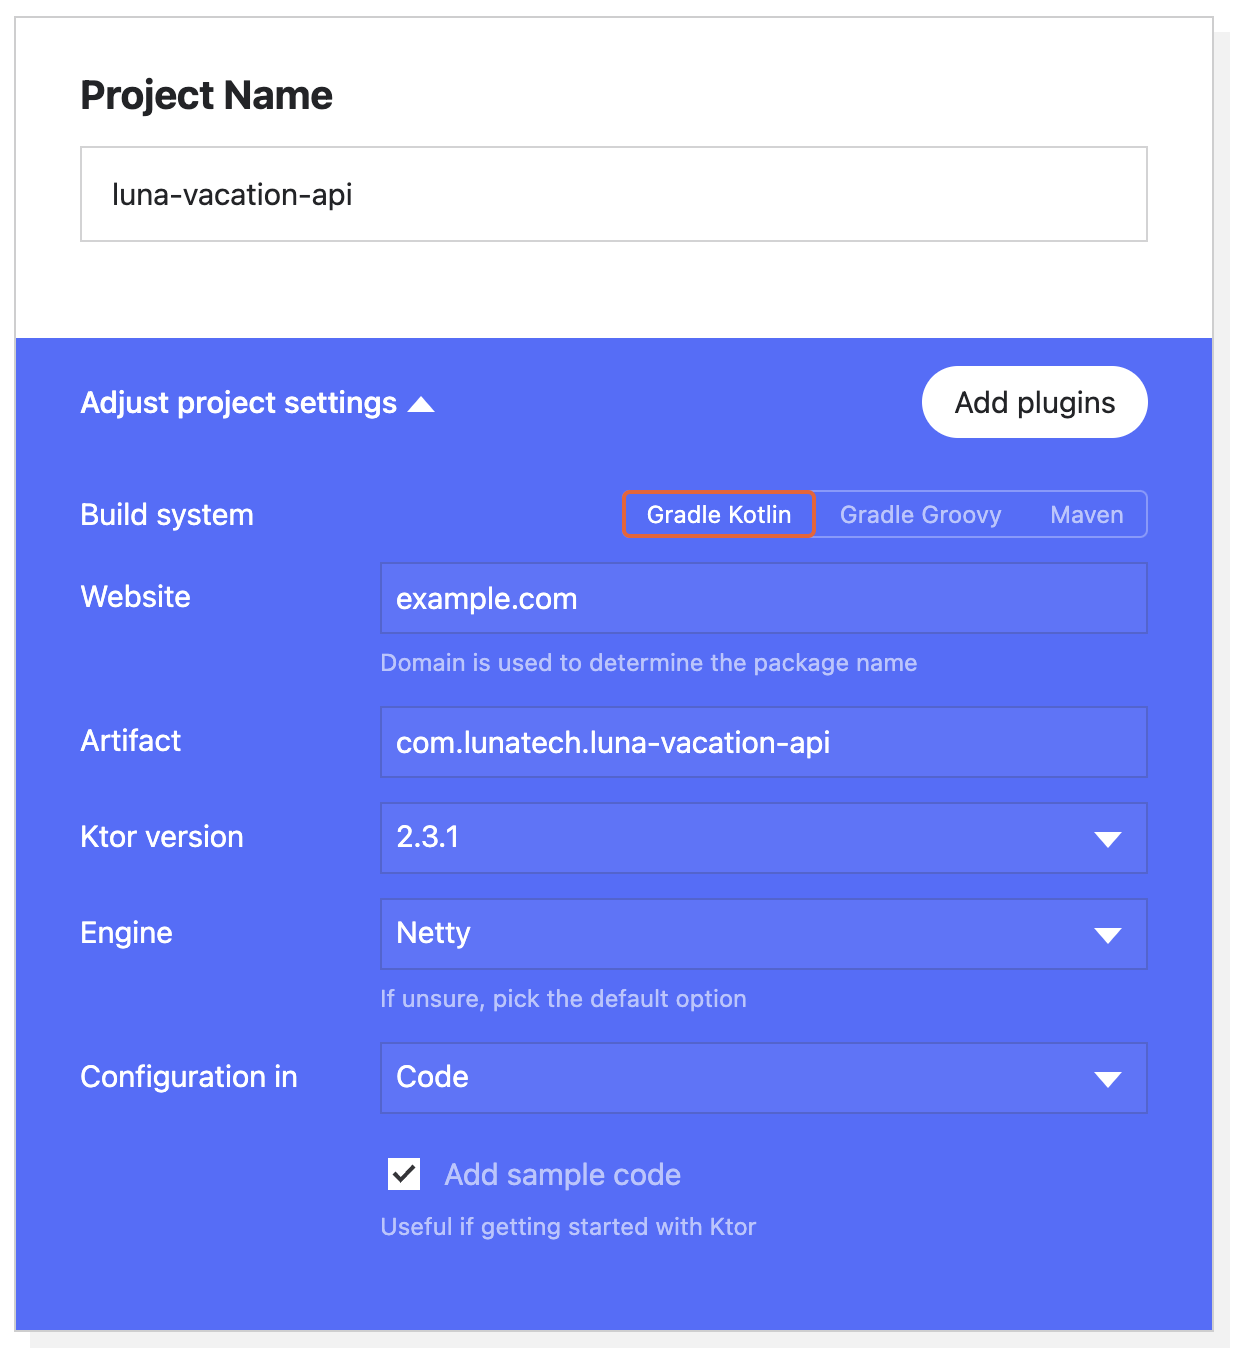
Create the luna-vacation-api
We are using Kotlin and Ktor to build the API. Following the recent tendency, Ktor provides a project scaffolding generator that adds some sample code and allows adding plugins. Remember to add the Authentication JWT plugin.
Download and open the project in your IDE of choice. The test dependencies and test folder can be removed.
Following the documentation in ktor.io on how to handle JSON web tokens let’s add the following dependencies in build.gradle.kts:
implementation "io.ktor:ktor-server-auth-jwt:2.3.0"
implementation "io.ktor:ktor-server-auth-jwt-jvm:2.3.0"
We can now start adding some code. Let’s start by our API endpoint onvacation that determines that odd day numbers are days off and even days are working days.
fun Application.configureRouting() {
    routing {
        authenticate("auth-jwt") {
            get("/onvacation") {
                val today = LocalDate.now()
                if (today.dayOfMonth % 2 == 0) {
                    call.respondText("Today you have a day off")
                } else {
                    call.respondText("Today you have to work")
                }
            }
        }
    }
}
You can notice that the endpoint already includes an authentication precondition called auth-jwt.
This detail is very important, as without it the endpoint would be available to non-authenticated parties.
In fun Application.module() we need to set up how this authentication takes places.
In our case we can validate the token realm, issuer, audience and limit access to luna-vacation-bot for authorized parties only. The token signature also needs to be validated and for that we need to provide the url to the JSON Web Keys available in the protocol/openid-connect/certs endpoint.
install(Authentication) {
        jwt("auth-jwt") {
            realm = "lunarealm"
            verifier(
                UrlJwkProvider(URL("http://localhost:8080/realms/lunarealm/protocol/openid-connect/certs")),
                "http://localhost:8080/realms/lunarealm",
            ) {
                withAudience("luna-vacation-bot")
                withClaim("azp", "luna-vacation-bot")
            }
            challenge { _, _ ->
                call.respond(HttpStatusCode.Unauthorized, "Token is not valid or has expired")
            }
            validate { credential ->
                validateCredential(credential, issuer)
            }
        }
    }
If the authentication fails it returns the challenge, in this case a 401 Unauthorized with an error message.
The validateCredentials function is simply validating that the token has not expired, after all other validations have passed.
fun validateCredential(credential: JWTCredential, issuer: String): JWTPrincipal? {
    if (credential.expiresAt?.after(Date()) == true
    ) {
        return JWTPrincipal(credential.payload)
    }

    return null
}
Test the API
We can test the api using curl.
If we secured the endpoint properly, calling the onvacation endpoint without a token should return an error.
$ curl localhost:4040/onvacation
Token is not valid or has expired
As explained in the initial diagram, we need to request a token from Keycloak and send it together with the request. We can use the credentials we have for luna-vacation-bot:
curl -X post 'http://localhost:8080/realms/lunarealm/protocol/openid-connect/token' \
--header 'Content-Type: application/x-www-form-urlencoded' \
--data-urlencode 'grant_type=client_credentials' \
--data-urlencode 'client_id=luna-vacation-bot' \
--data-urlencode 'client_secret=<replace-by-secret>'
We grab the access_token part of the response and add it to the request header as a Bearer token:
$ curl 'localhost:4040/onvacation' \
--header 'Authorization: Bearer eyJhbGciOiJ...QBhNiX6w'
And now we get a result:
Today you have to workCreate the luna-vacation-bot
To create the luna-vacation-bot project we are going to use Intellij and create a new Kotlin application, with Gradle and JDK 17 (you can use JDK 8 or higher). After creating the project we can remove the test folder and the test dependencies.
Integrate with luna-vacation-api
In order to query the luna-vacation-api we need an http client. We are going to use the ktor-client library by adding the necessary dependencies to build.gradle.kts:
implementation("io.ktor:ktor-client-core:2.3.1")
implementation("io.ktor:ktor-client-cio:2.3.1")
implementation("io.ktor:ktor-client-serialization:2.3.1")
implementation("io.ktor:ktor-client-content-negotiation:2.3.1")
implementation("io.ktor:ktor-serialization-kotlinx-json:2.3.1")
When creating the http client we need to add the json ContentNegotiation and the flag ignoreUnknownKeys for the response deserialization,
to ignore the json fields that we are not interested in.
    val client = HttpClient(CIO) {
        install(ContentNegotiation) {
            json(
                Json {
                    ignoreUnknownKeys = true
                },
            )
        }
    }
Now that the http client is properly setup we will start by retrieving a JWT token from Keycloak:
@Serializable
data class BotToken(val access_token: String)

val token = client.submitForm(
        url = "http://localhost:8080/realms/lunarealm/protocol/openid-connect/token",
        formParameters = parameters {
            append("grant_type", "client_credentials")
            append("client_id", "luna-vacation-bot")
            append("client_secret", "<replace by client_secret>")
        },
    ).body<BotToken>().access_token
and then we can finally call the luna-vacation-api:
val response = client.get("http://localhost:5050/imionvacation") {
        bearerAuth(token)
}.bodyAsText()Create a Slack app
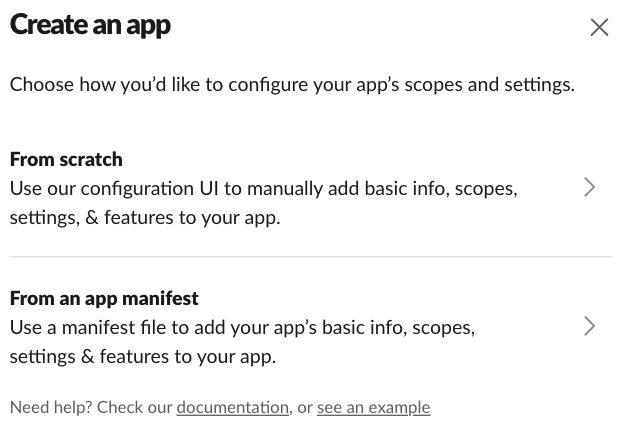
You can create your own workspace at slack.com. Once you have it, you can create a new App. Choose Create New App and then From scratch:
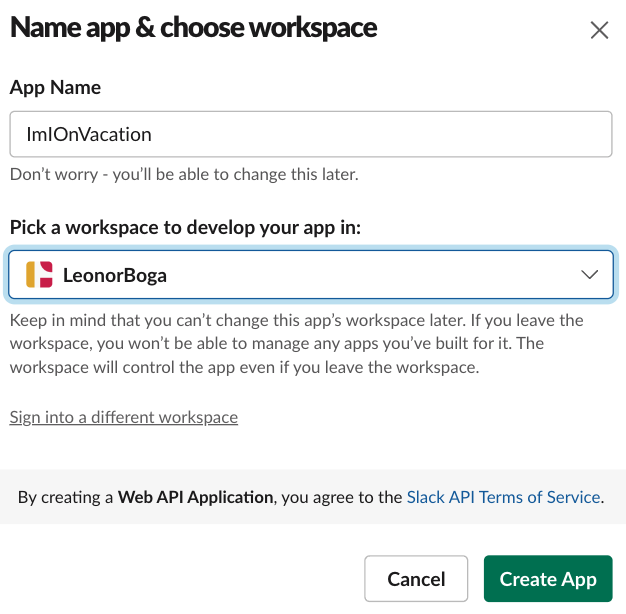
I named the app ImIOnVacation and added it to my personal workspace:
To finalize the App creation you need to set some permissions:
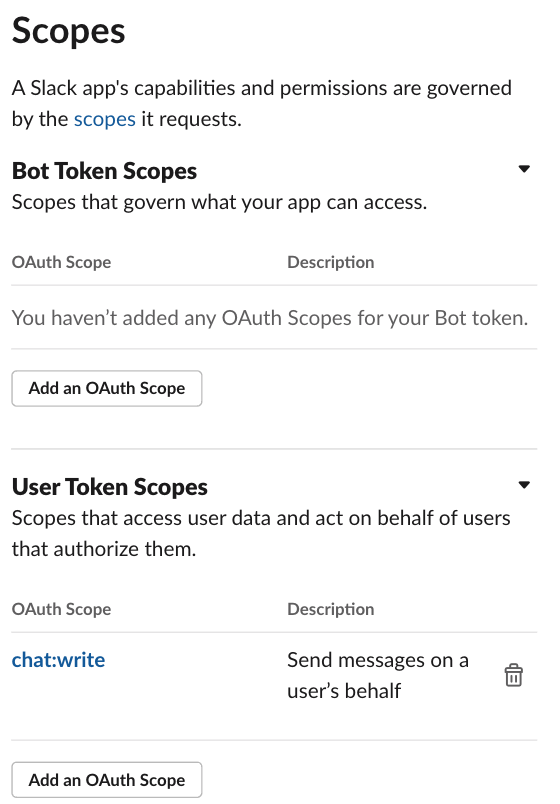
In Basic Information you can personalize the appearance off the app, but for now let’s jump to OAuth & Permission and, from there, scroll down to the Scopes section. In User Token Scopes add the scopes chat:write:
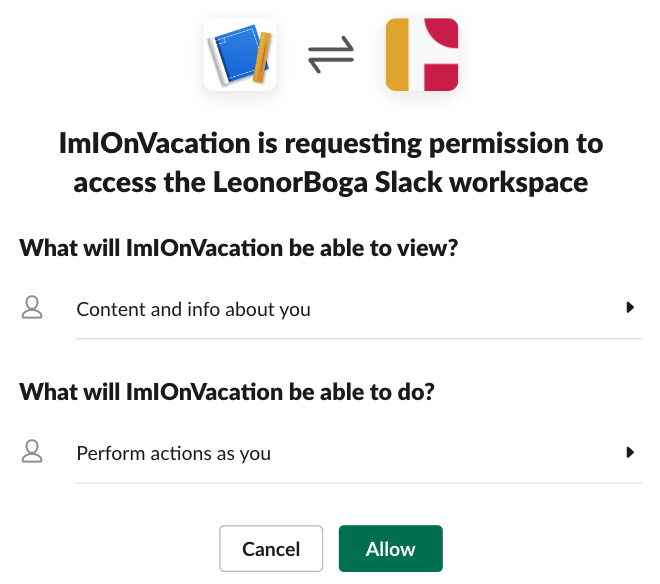
Then scroll up and click Install to Workspace. That will take us to a permissions screen: click Allow. We can see that a User OAuth Token was created as well.
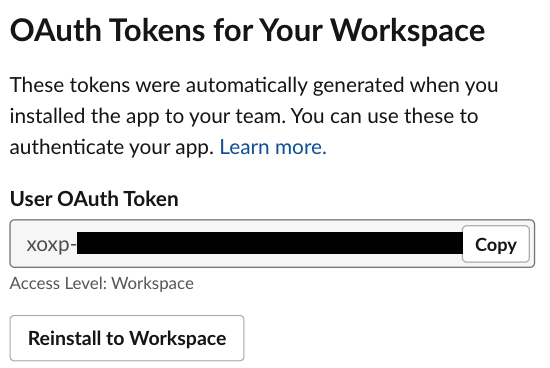
We will need this User OAuth Token to be able to send messages to Slack via this App.
Put it all together
We can now send that luna-vacation-api response to a Slack channel. The channel I’ll use is the chat with myself.
On Slack, channel IDs can be seen on the channel or chat details, at the very bottom.
For the communication with Slack we will use Slack’s Bolt SDK, starting by adding the necessary dependencies:
implementation("com.slack.api:bolt:1.29.2")
implementation("com.slack.api:bolt-servlet:1.29.2")
implementation("com.slack.api:bolt-jetty:1.29.2")
implementation("org.slf4j:slf4j-simple:1.7.36")
Now let’s compose our message.
The function getOnVacation is wrapping the luna-vacation-api request.
val text = getOnVacation(client)
val response = slack.methods("xoxp-...").chatPostMessage { req: ChatPostMessageRequestBuilder ->
    req
        .channel("<replace by my channel>")
        .text(text)
}
Make sure luna-vacation-api is still running and now let’s run luna-vacation-bot. If we check Slack we should see a message:

The complete source code for the luna-vacation-api and luna-vacation-bot are available on GitHub.
Next steps
We can transform this kind of application integration in a real automation by running it periodically. A cron job allows to achieve this goal and the quartz-scheduler library integrates well with Kotlin. The cron job can be configured as often was one wishes like several time a day or once a month, for example.
In this blog post we used a dummy API. For a real use case we could replace it with an API that provides data reports, for example. Imagine yourself surprising your manager with some automated reports delivered to their Slack or email address!